Process of Designing a Printed Circuit Board Prototype
A PCB prototype is a key step in the development of an electronic device. The prototyping process is designed to ensure that a device meets its intended functionality before going into production and helps minimize the risk of faulty or inefficient products. The process is also valuable for testing a circuit’s performance and can help identify areas where improvements are needed.
The first step in designing a printed circuit board prototype is to create the schematic diagram using specialized electronics design software. This will provide a visual representation of the circuit and allow you to plan where each component should go, their connectivity and the placement of traces.
Once the schematic is complete, you can move on to creating a physical model of your printed circuit board prototype using a variety of prototyping methods. This may include breadboarding, perf boarding or PCB fabrication. The method selected will depend on the complexity of your design and your budget.
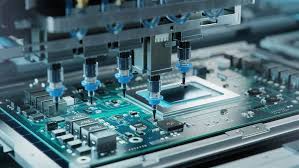
The Process of Designing a Printed Circuit Board Prototype
Once the PCB is fabricated, it’s time to add the components. This can be done using Surface Mount Technology (SMT) or Through-Hole Technology (THT). Once the components have been inserted into the holes, they are then soldered onto the board. Depending on your needs, you can choose to visually inspect the assembled prototype or conduct a series of tests with equipment like oscilloscopes and multimeters.
During the assembly phase, it’s important to follow all rules and guidelines set by the PCB manufacturer. This will ensure that your PCB is manufacturable and meets industry standards, such as minimum trace widths and spacing. It’s also essential to adhere to design rules and constraints, including the use of a ground plane to reduce electrical noise and improve performance.
Before you send your printed circuit board to the manufacturer, make sure it’s ready for manufacturing by generating Gerber files. These are the industry-standard file formats that contain all of the details needed for the fabrication process, including the layout and drill data. It’s also important to verify these files using a Gerber viewer, which can highlight any errors or discrepancies in the files that could impact the final product.
A functional prototype is a close approximation of the final product. It should include all of the intended functionality and be manufactured to the same specifications as the final product, with the exception that some finishing touches might not be applied in order to save costs. A functional prototype may also be fabricated on different equipment, and the material used in the manufacturing process can vary from that of the final product.
After the prototype has been assembled and tested, you can proceed with a full production run. It’s important to keep detailed records of any changes made throughout the prototyping and testing phases, so that you can make sure your product is exactly as you want it to be.
At PCBCart, we offer a wide variety of printed circuit boards and can produce prototypes quickly to help you get your project off the ground. Our fast turnaround times and commitment to quality can help you take your concept from the drawing board to a fully functioning electronic device. Contact us today to learn more about our services and how we can help you with your next project.